Hey Hey everyone!
As promised, this week we will be diving into how I completed another wall in my living room on the cheap. Last time, I really laid the groundwork for WHY this project was so important for me and why I think its really going to be important for you too. 🙂
A couple of January’s back, I was ready to take my Living Room by storm, you’ve already seen the first leg of that but as we all know there are 3-4 walls in any given room. I was overflowing with ideas, but none of which were practical for my time schedule (working in full-time ministry), skill set (we lack mad-carpentry skills in the Rea household) and budget. Until…one Sunday afternoon I happened upon Pottery Barn and inspiration hit me like a ton of bricks.
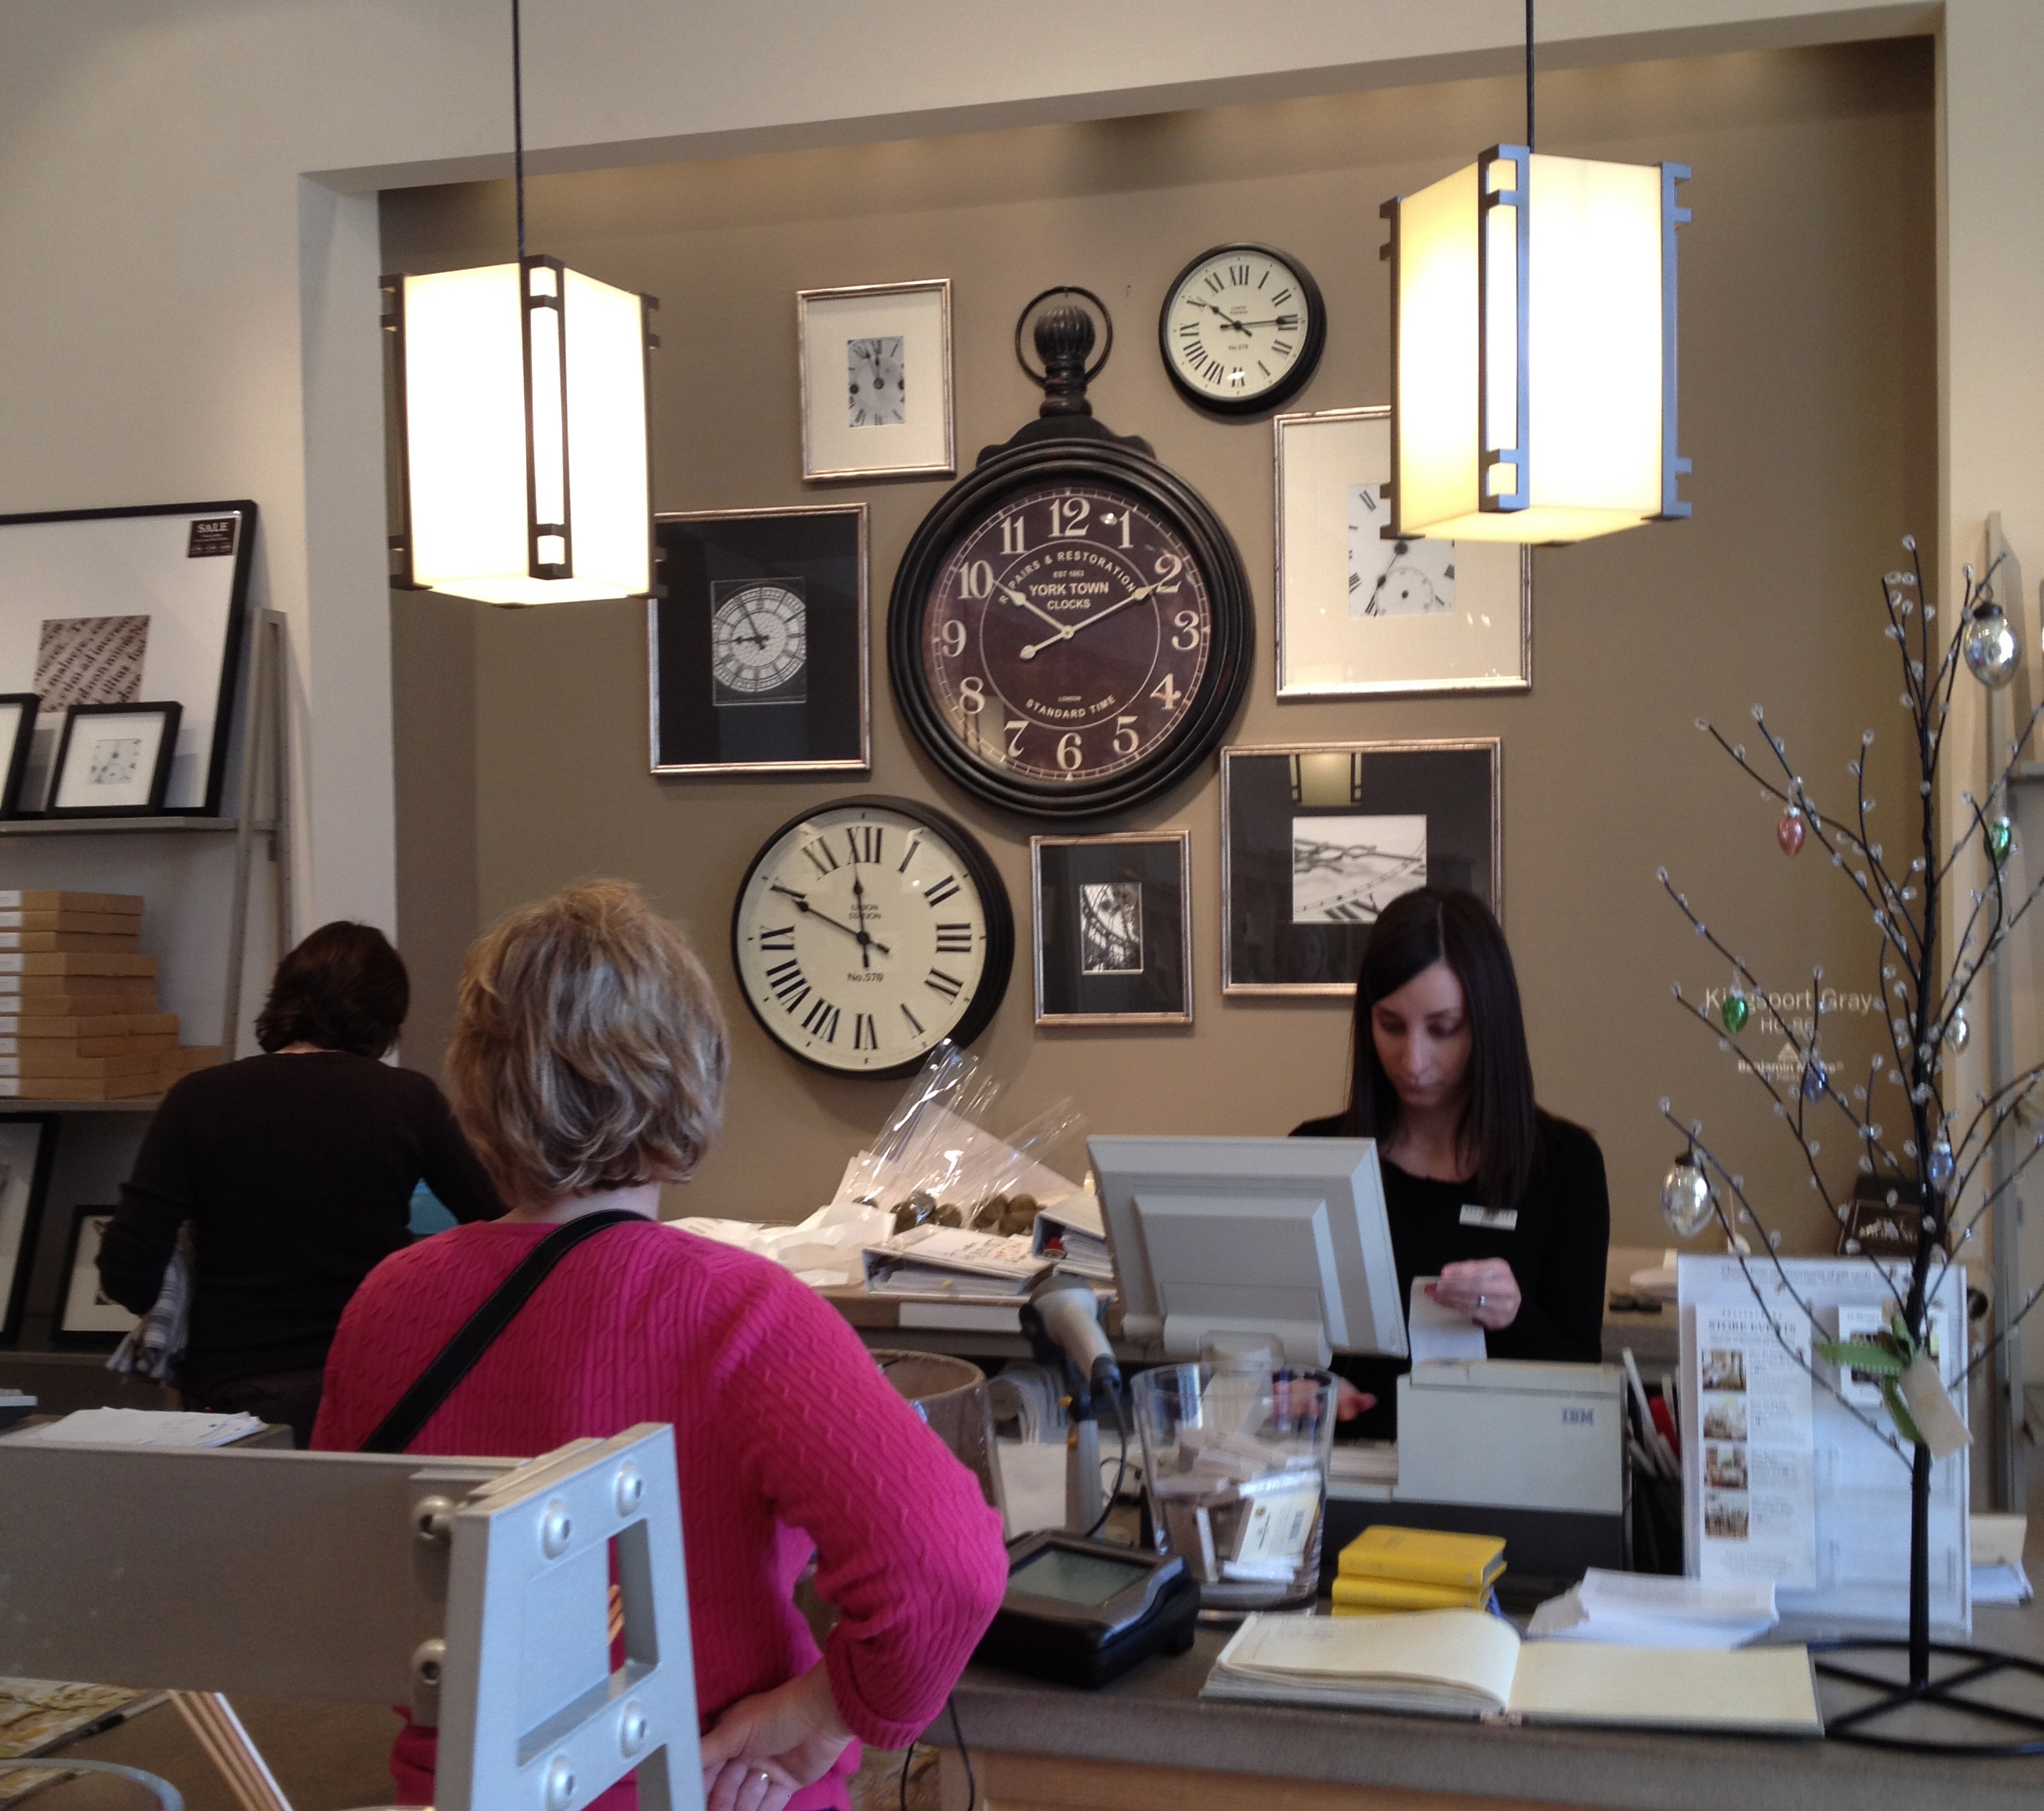
Bam…and yes, I unashamedly snapped that photo like a creeper. LOL There’s no room for pride when you have a moment of genius 🙂 ha-ha. I fell head-over- heals for that Clock wall. The issue was the amazing York Town Clock was as much as a compact car payment and the purchase of it was not happening anytime soon. But since creativity should never be constrained by such elements, I improvised.
Enter Home Goods. There are very few people in the world that don’t love a 20 min investment perusing the aisles of Home Goods and I am certainly not one of them. It’s sort of like a creative treasure hunt every time you go in and I was certain that they would have the perfect big clock. Well, they didn’t at first, but the thing about Home Goods is you have to be willing to try try again! When you’re building a creative home on a budget, patience is key. Eventually, I did find a large enough clock in the style I wanted for my wall, though not a replica for the York Town, at $39.99 it was going to be “mine own interpretation.” I eventually did find a similar “pocket watch” style clock at Kohl’s on clearance for $12! Cue Hallelujah Chorus. Now, I had my 2 clocks to anchor the wall, but needed framed clock pictures to complete the look. Sooo…
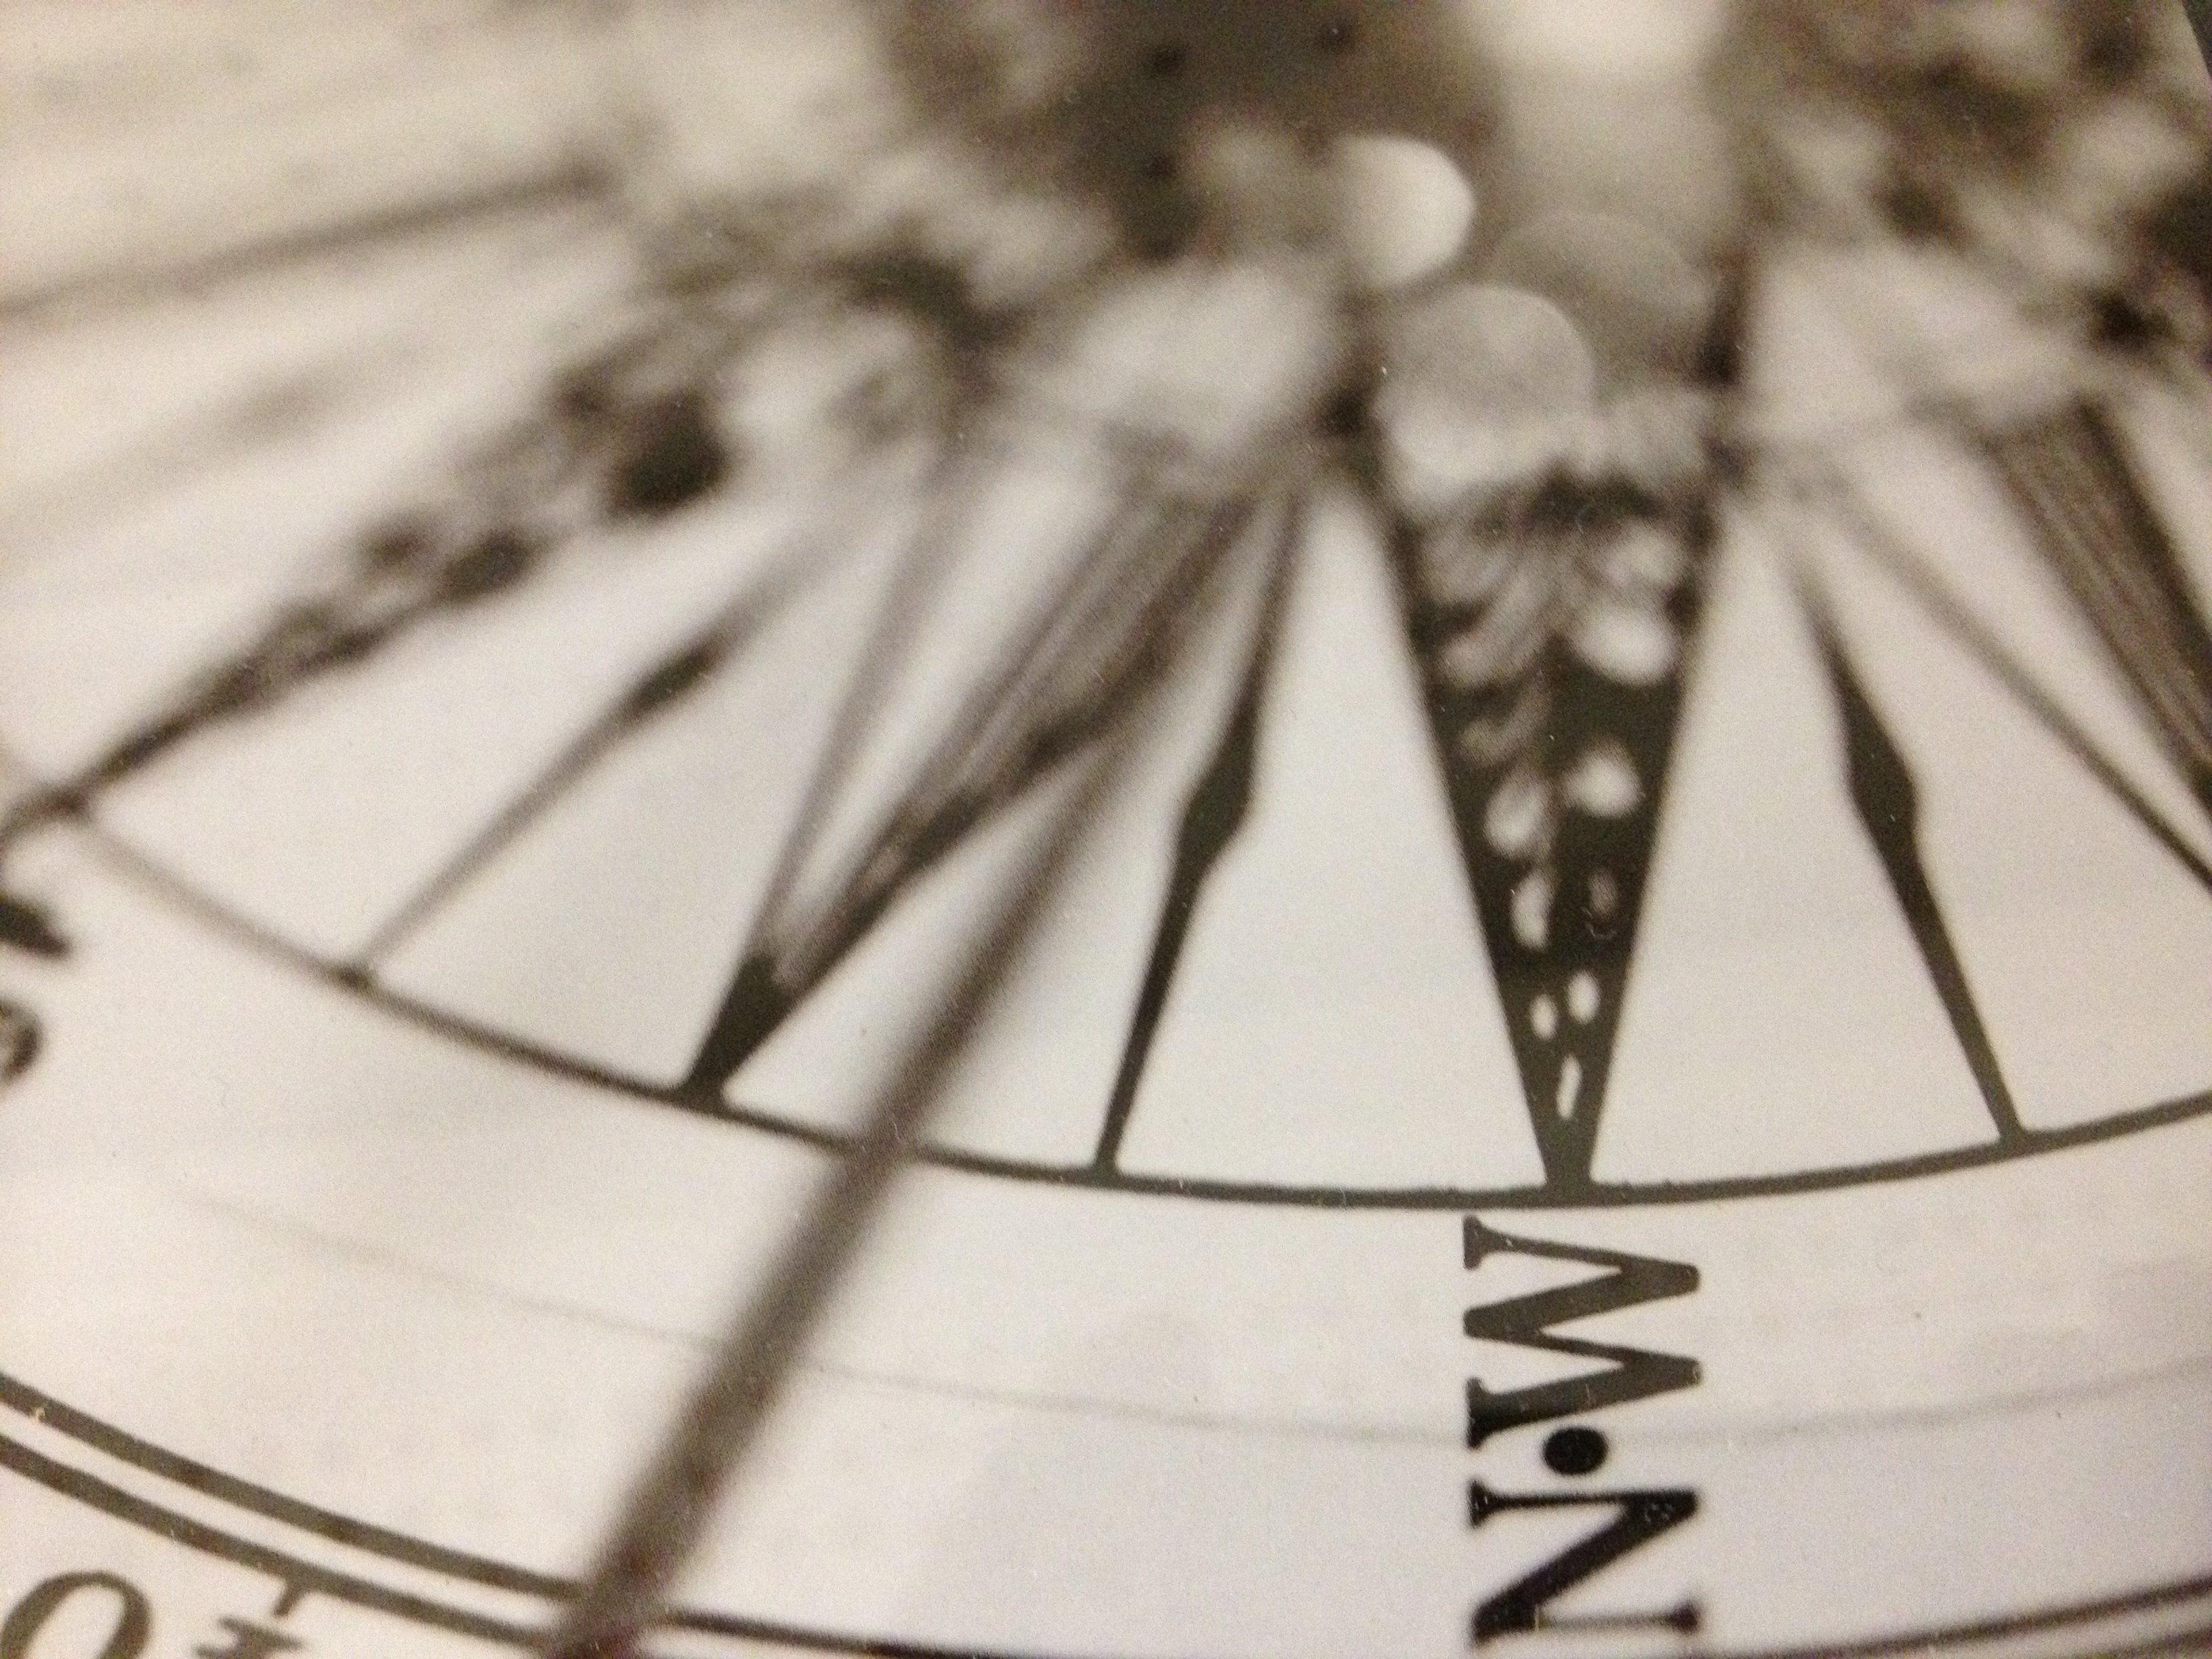
Over the next month every time I was out I would head to the clock/artwork section of a store, find the coolest clock face I could and snap a picture with my iPhone. This is actually waaay more fun and trickier than it sounds.
If you saw me at a store during that particular time, I’m not sure if I should apologize or say “you’re welcome” for providing you with entertainment. The key when you’re taking pictures of anything with glass covering the front is to avoid the glare of overhead lights, which in a department store is nearly impossible. (To hear more about my disdain for florescent lighting click here.) I was the crazy girl moving clocks around the store and getting in odd positions to avoid the dreaded glare. It was a fun hobby, I’m actually sort of sad its behind me.
I found clock faces like this at Home Goods

And my favorite, a picture of a compass from Michaels. Compass, clock, close enough.
Once I was done losing my pride in all of the home stores in South Eastern Michigan, I purchased frames from Target and Michaels. To achieve a gallery wall effect I used a little tip my friend Nate Berkus taught me. Can I just tell you how sad I was when his talk show went off the air? A tear may have been shed. I digress.
Get yourself a roll of brown paper. I got mine at Office Max. Lay it out on the floor, put your frames, clocks, etc. on top and then trace each and cut them out. Now, you have a template for your artwork.

You can move it around ‘til your hearts content without damaging your walls or juggling your frames. Don’t thank me, thank Nate.
Next, all there is to do is put a couple of nails in the wall and enjoy!
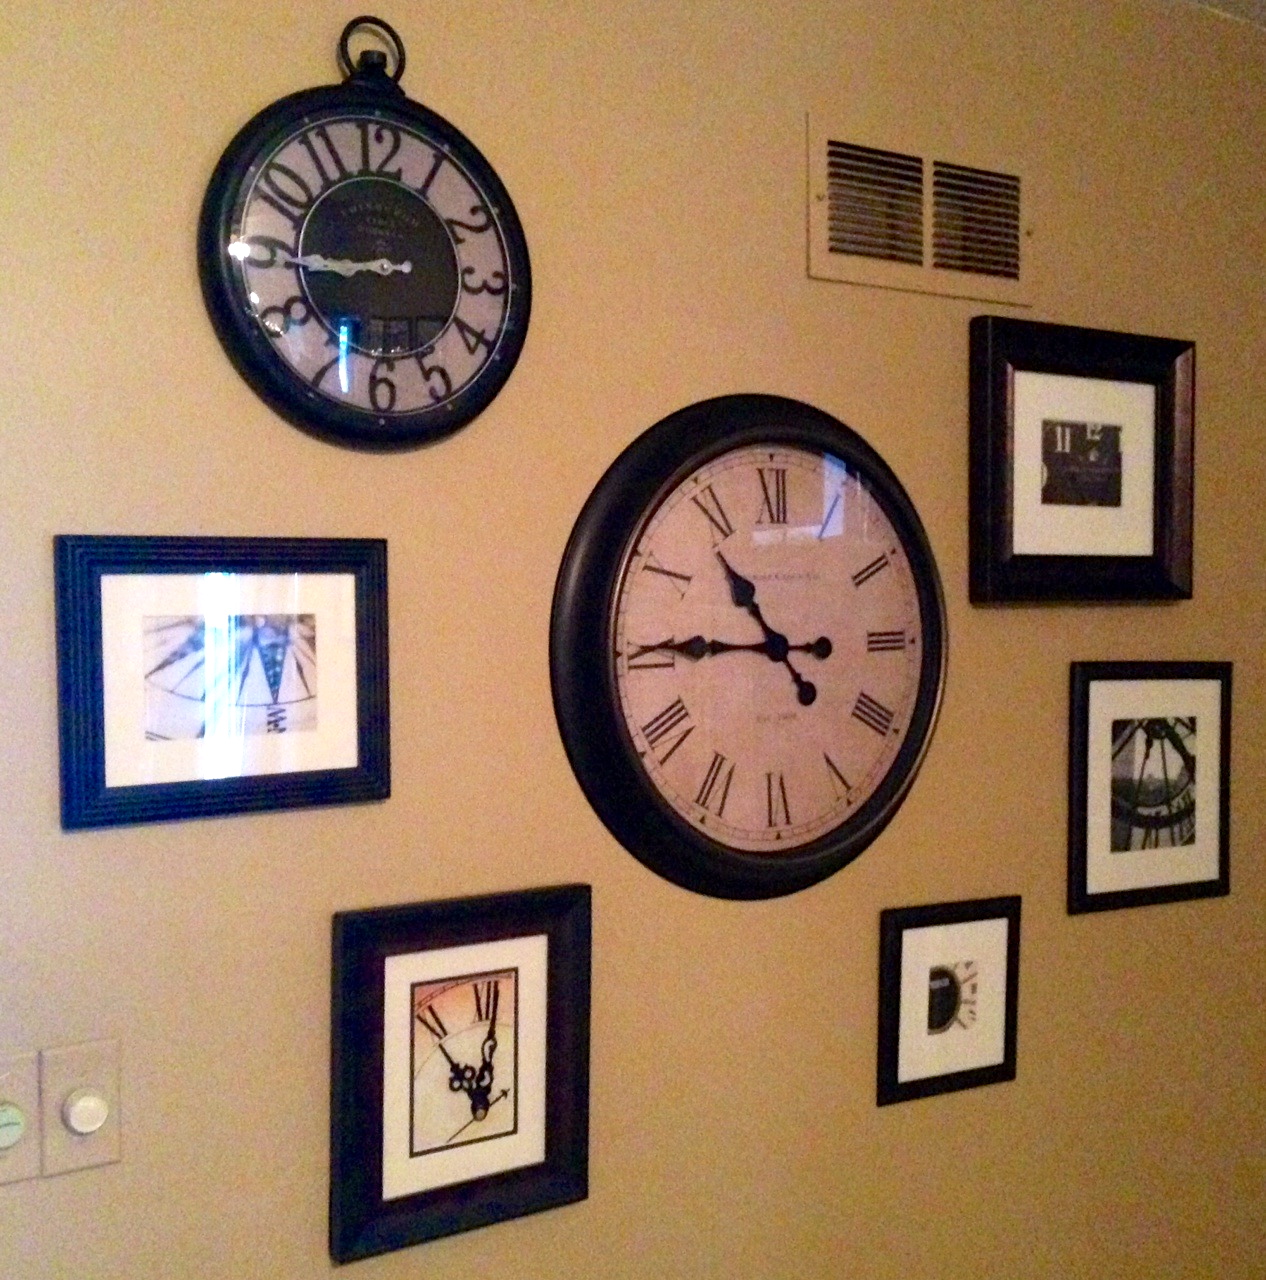
Please ignore the dreaded glare! 🙂
Hope you have enjoyed this little glimpse into my living room and my brain.


That is awesome Megan. Love it
Thank you so much!
Awesome job Megan, thanks for sharing. Xo
Thank you Sue!
You are very talented! I love reading your blogs! Keep doing what your doing! You are a blessing!!
Thank you Jan, that means so much to me! 🙂
I often go to Pottery Barn for inspiration and then go on my hunt to find everything at a less expensive price. Love this post and Love your wall.
Thanks so much! That’s awesome Sheryl! Only way to go 🙂
I love this! Gallery style walls are my favorite 🙂
Thanks so much Madison, I’m a huge fan of your blog! So glad you stopped by 🙂
super cute and creative! I think it turned out really great!
Thank you so much Beka! Glad you stopped by 🙂
Ooh, what a beautiful wall! I’m totally with you on the no shame snapping photos when you have a good idea bit, I do it all the time. 🙂
Thanks for linking up with Jack of All Trades!
Thanks Chantel! Good to know I’m not alone when I’m trying to be all nonchalant in the stores 🙂